Overview

| By | Mike Nelson |
|---|---|
| Supports | * front matter * 1 layer of nesting (each article can put in a part) * back matter |

Purpose
Very similar to Print My Blog Free, but supporting Pro features. Great for making a PDF for an easy-to-read digital backup of your favorite website content.
Features
- Supports nesting articles (like posts and pages) into “parts”
- External hyperlinks (links to web pages not in the project) can be automatically converted to footnotes, left in-place, or removed
- Internal hyperlinks (links to content included in the project) can be automatically converted to to footnotes, inline page references, left in-place, or removed
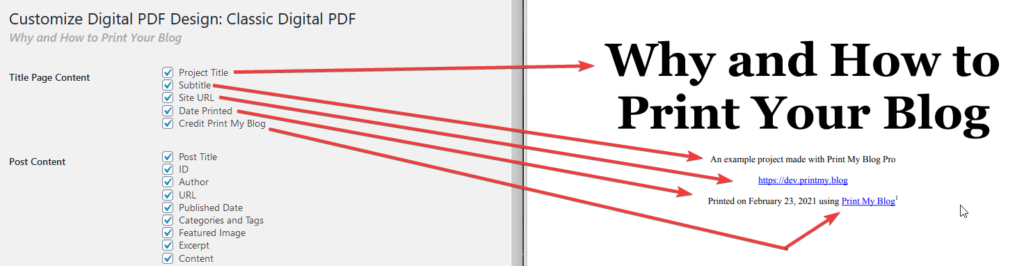
- The default title page can include: Project Title, Subtitle, Site URL, Date Printed, Credit to Print My Blog
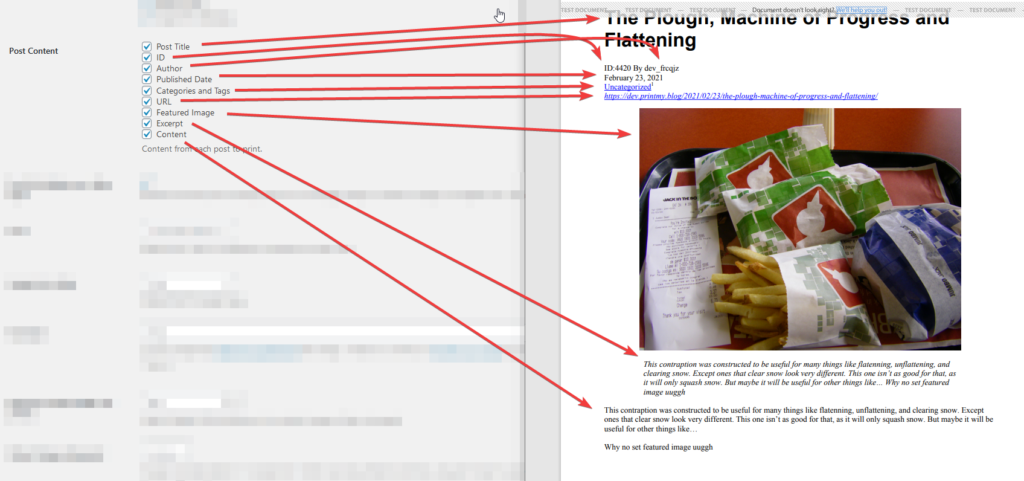
- Each article can include: Title, ID, Author, URL, Date Published, Categories and Tags, Featured Image, Excerpt, Custom Fields, Content
- Optionally automatically center images
- Optionally float images to the top or bottom of each page
Page Layout
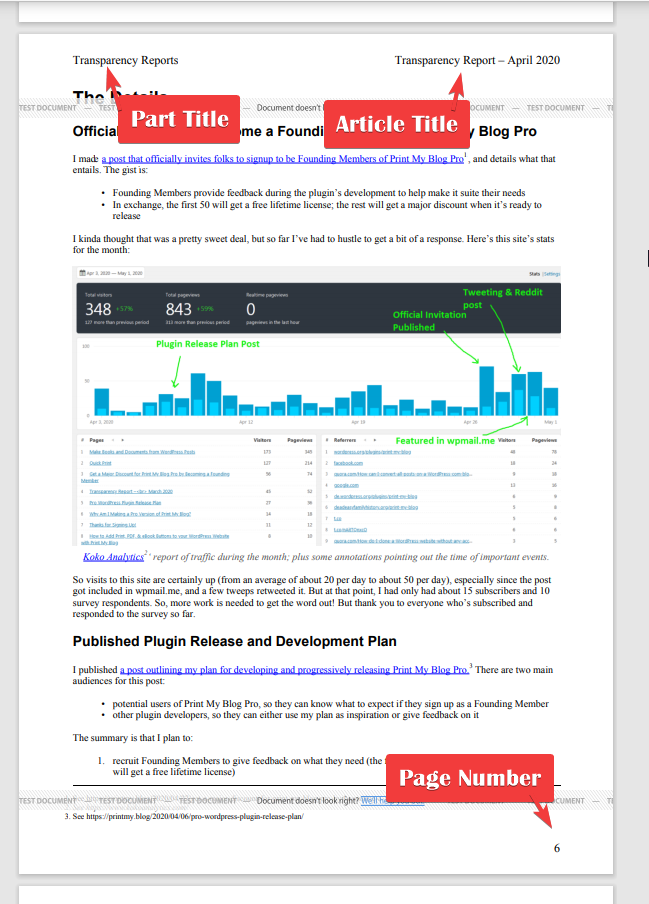
- Page numbers in bottom-right corner, article titles in the top-right, and part titles (if using parts) appear in the top-left corner. Front-matter’s pages are numbered with Roman numerals
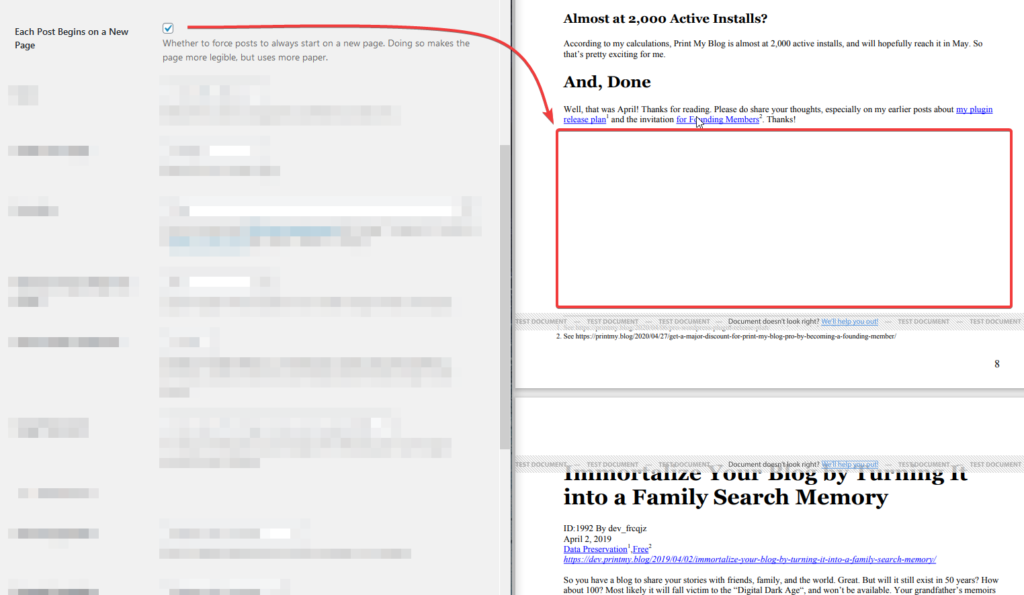
- Each article can optionally begin on a new page

“Header Font” controls which font is used for all headers.
“Font” controls which font is used for non-header text.
“Font Size” controls the base font-size (headers are always proportionately bigger).

“Default Image Alignment” can automatically center images with no alignment, which often looks better in print.
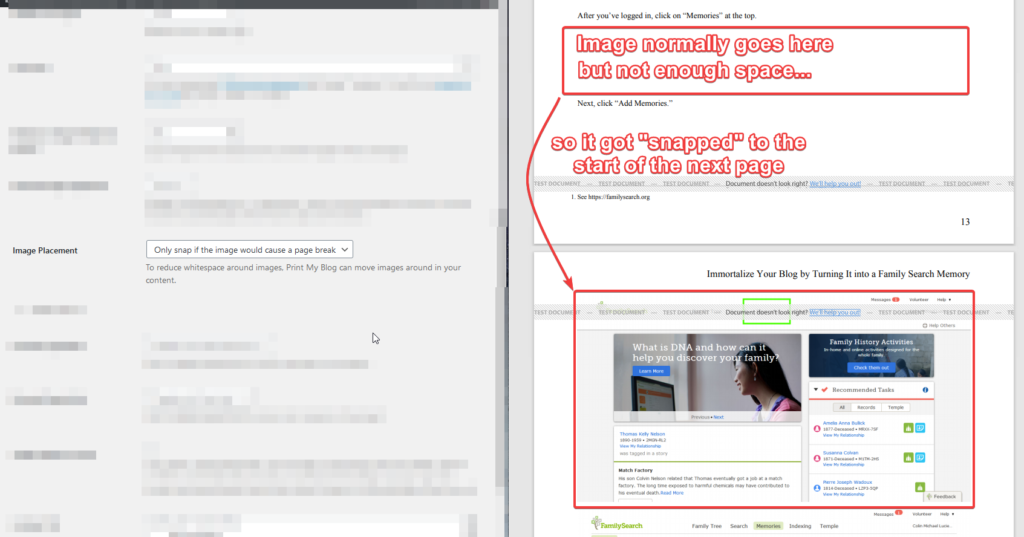
Setting it to “Don’t Move” means PMB Pro will never do that; “Snap to Bottom or Top of Page” will always “snap” all images to the top or bottom of their page; and “Only snap if it would cause a page break” will only move images if it will improve the page layout.


“Remove” will remove the link (but leave the text); “Leave as hyperlink” will leave them as-is; “Replace with page reference” (only for internal hyperlinks) will add text like “(see page 124)”; “Replace with Footnote” will add a footnote with the full URL written out.
Generic Settings
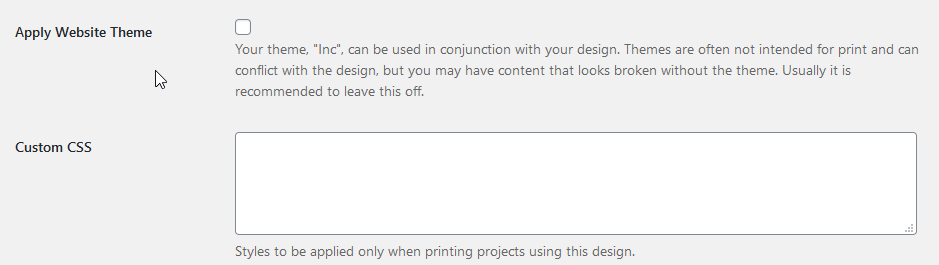
“Custom CSS” is CSS code to be used only in files PMB Pro generates; it won’t be used anywhere else on your website. Because PMB Pro uses Prince CSS, use any CSS from the official Prince documentation.