Overview
This is the step where you find content for your project, add it, and organize it.
Finding Content
On the left is “Available Content” from your website: posts, pages, print materials and other custom post types added by other plugins.
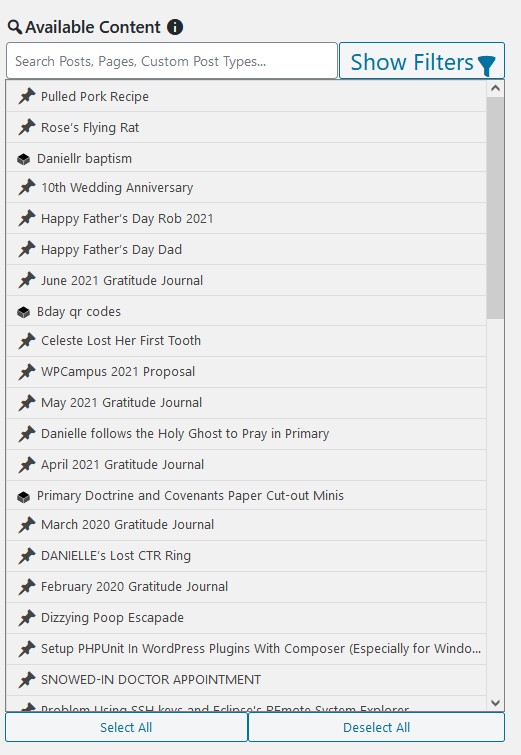
Enter a search term, like “Print My Blog”, to find all content that has that search term in the title or body.
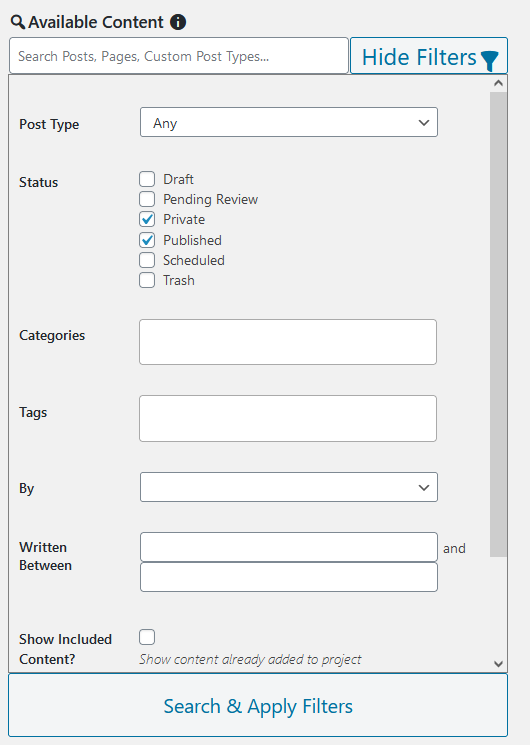
Click “Show Filters” to narrow down your search. You can filter by post type, status, categories, tags (and other custom taxonomies added by other plugins), author, and date. By default, only items not already in the project are shown. Uncheck “Show Included Content” to show everything, including items already in the project.
Lastly, you can change the order in which available content is shown (by ID, post title, date, or search relevance).
Click either “Hide Filters” or “Search & Apply Filters” to view available content matching the criteria you’ve set.
Adding Content to a Project
Adding Individual Items
Once you have found the content you want to add to your project, the simplest way to add it is to press the “+” (plus sign) on the row (these buttons appear when you hover over the row.) This will add that item to your project’s main matter.

Another option is to drag-and-drop the item into the project’s content.
Adding Many Items at Once
To move multiple items at once, you first need to select them.
Hold down “Control” on your keyboard, and then click on each item you want to select.
Hold down “Shift” on your keyboard, and then click on two items: all the items between them will also be selected.
Or lastly, click “Select All” to select all available content matching your filters and search criteria.
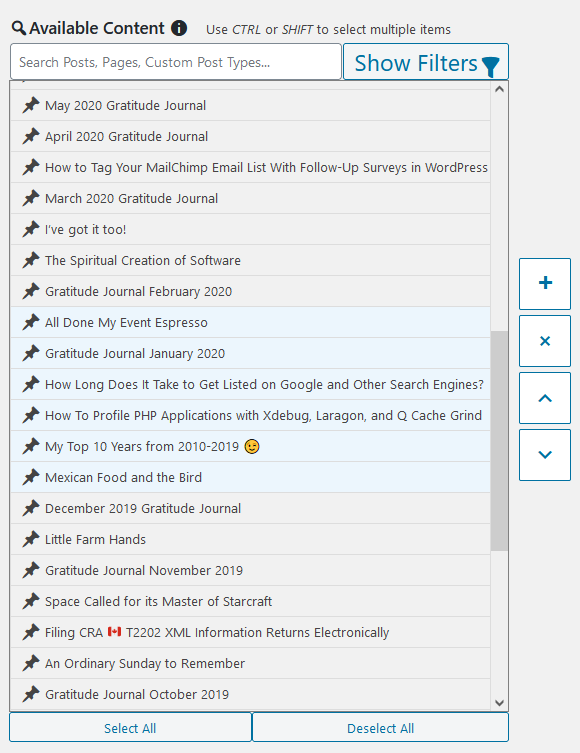
Once you’ve selected some items, you can again drag them over (they will all move together), or press the larger new “+” (plus) button that appeared to move them all over to the main matter.
Organizing Content Inside a Project
After you’ve added items to your project, you can reorder and move them around by dragging-and-dropping. Alternatively, you can select items (using “Control” and “Shift” again) and click the up and down arrow buttons that appear.
Before you get too far with that, let’s get familiar with the parts of a project.
Front Matter
The “Front Matter” is the preliminary part of a book that comes before the main text. E.g., a title page, table of contents, introduction, prologue, etc. Designs often number these parts with roman numerals. Front Matter is a flat list of items and cannot be organized into parts.
If you’re not writing a book, you may want to only include a title page.
Main Matter
The “Main Matter” is the chapters or articles of the work. Most designs support dividing this content into “parts” (more on this in a moment).
Back Matter
The “Back Matter” is supplementary content about the work that comes at the end. Designs might style it the same as the main matter, in which case it’s just an organizational aid. Like Front Matter, Back Matter is a flat list of items that cannot be organized into parts.
Parts
Most designs support dividing the main matter into parts.
To create a part, just drag other items inside it. Or, select an item in the project, and use the up and down arrow buttons to move items into it.
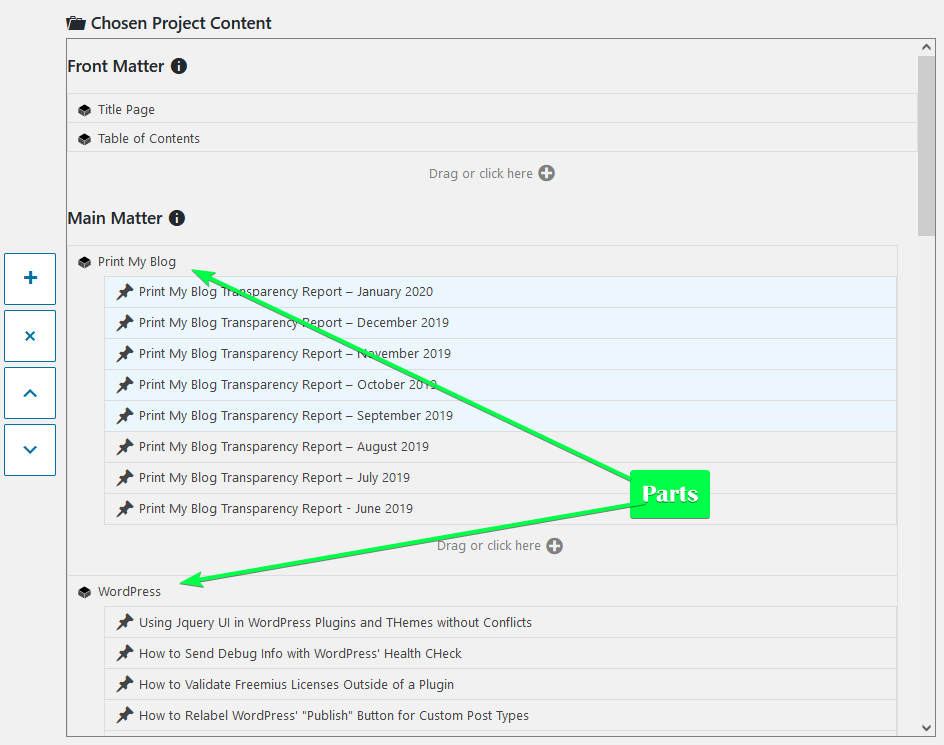
Also, notice the “up” and “down” arrow buttons on the left, which are used to move selected items.
The up and down arrow buttons move selected items into parts where possible, and can also move them out of parts, and into the front and back matter. Try clicking them a few times to get used to how they work.
Adding New Items (“Print Materials”)
In addition to adding existing posts, pages, and custom post types into a project, you can create new items from this same page to be used as parts, front and back matter, or even main matter. Content added on this page is “Print Materials” which can only be used for PMB projects—they won’t appear anywhere on your website.
To create a new Print Material, click anywhere it says “Drag or click here +”.
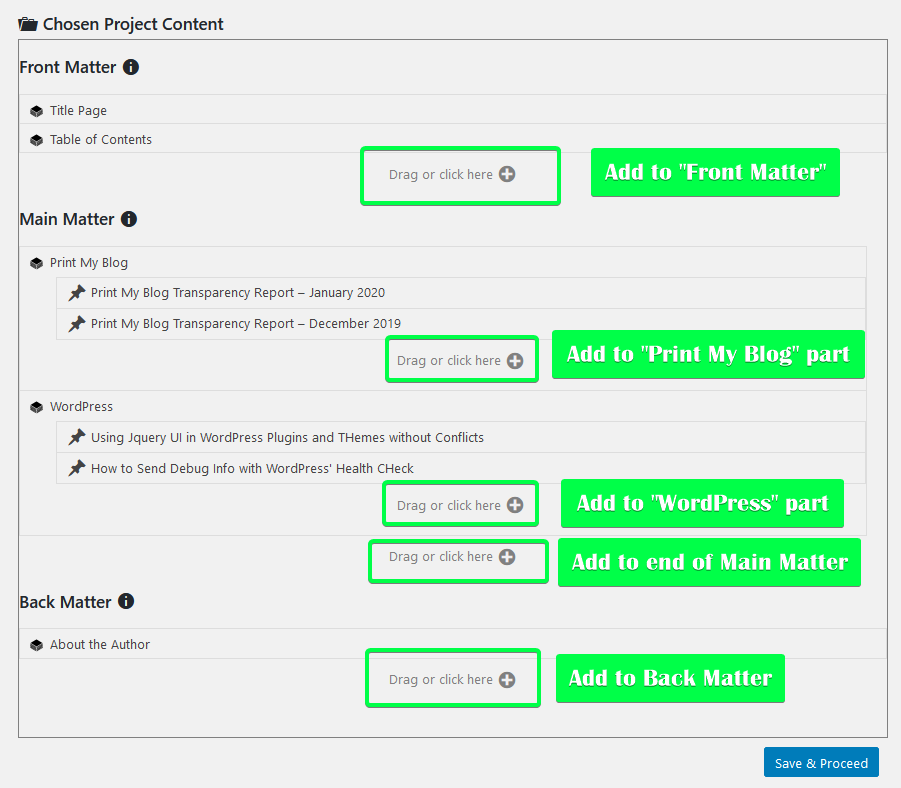
New Print Materials like this are initially created with only a title (which might be all you want, in case that Print Material will just be a part heading), but you can click the row’s pencil button to edit the content in another window.
Choosing Section Templates
When you hover over an item added to your project, you’ll notice a dropdown menu, with options “Default Template”, “Fullpage Content” and “Centered Content” (and possibly others.) This is the “Section Template” used for the item. It controls how the item’s content will be displayed.

- “Default Template” uses the design’s default section template. Usually that will show the item’s title and body, and possibly other information like date published and author. Often this is configurable in the “Customize design” step.
- “Fullpage Content” will exclude the item’s title and other meta information, and only show its content. Useful if you don’t want the item’s title to appear.
- “Centered Content” is like fullpage content, except it is centered in the middle of the page. Useful for copyright pages, dedications, and other brief content.
You can set a different “Section Template” for each item. Also, if an item is included in multiple projects, you can choose a different section template for it in each project.
Each design may add different section templates, and designers can create their own. If you find yourself wanting to change all of the items to use a different section template, you probably want to instead create a custom design whose default template looks the way you want.
Example Uses
Here’s how to use the project editor for a few common use-cases.
Add All Blog Posts
To add every single blog post to a project, do the following:
- Click “Show Filters”
- Beside “Post Type”, select “Posts” (you might want to scroll down and change how they’re ordered, for example you might want to order by date ascennding to show the oldest posts first)
- Click “Search & Apply Filters”
- Click “Select All”
- Press the large plus button that just appeared
Add All Posts in a Category
To have a project consisting of all posts in a single category, do the following:
- Click “Show Filters”
- Beside “Category”, search for your desired category.
- Click “Search & Apply Filters”
- Click “Select All”
- Press the large plus button that appeared to add them to the project’s main matter, or drag them to wherever you want to place them
Organize Posts by Category
You may want to divide your project into parts for each of the major categories on your website. To do that:
- Press the “Drag or Click Here” underneath the Main Matter. Give the new Print Material the name of one of your categories. Repeat this step for each category you want to use.
- Press “Show Filters”
- Beside “Category”, choose the category you want
- Click “Search & Apply Filters”
- Click “Select All”
- Drag them onto the corresponding Print Material in your project.
- Repeat steps 2-7 for each category
If you’re looking for more examples, you might want to read
- How to Add an Introduction, Copyright Page, or other Front Matter
- How to Customize your Project’s Title Page
- How to Divide Projects into Parts
- and other content from the Design & Layout How-Tos
Finishing Up
When you’ve finished organizing the content, click “Save & Proceed”. You can come back and edit project content more later, if you want.
Also note that, by default, the “Available Content” only shows items not already in your project. This means if you have created a project containing all posts, when you return to edit its content later, only new posts will appear in “Available Content”. You can choose to instead show previously-included content by using the filter “Show Included Content?”
