Overview
WordPress is by far the most common way to publish content online, whereas Microsoft Word remains the industry standard offline. However, that clean distinction between use cases sometimes gets blurred, like when you need to convert WordPress content into Word documents. This tutorial will go over the advantages of writing in WordPress and then exporting to Microsoft Word, review some options on how to do it, and give you step-by-step instructions on how to do it with the WordPress plugin Print My Blog.

Why Create a Word Document from WordPress Content?
Someone who only writes and reads content online might legitimately wonder why you would want to export your WordPress content as a Word document. While WordPress has a huge ecosystem surrounding it and is becoming the “operating system of the Internet”, much of the rest of the world still expect Word documents and won’t work with anything else.
Here are some examples of when you might need your WordPress content turned into a Word document:
- For collaboration. Even with plugins, WordPress’ tools for editing and reviewing content with others are not as good as Microsoft Word (yet). You might want to an outside editor to review your WordPress content, and often those editors refuse to work with anything other than a Word document.
- As a deliverable. Perhaps your boss, professor, or publisher requires a Word document (because that’s what they’re familiar with and they’re in a position to make such a demand).
- As an intermediate format to other programs. For example, Adobe InDesign is well-adapted to importing Microsoft Word documents, but not so much WordPress posts. You may therefore want to export your WordPress content as a Microsoft Word document, then import that into Adobe InDesign, or whatever other program you’re using.
- For manual, visual control of design in print. Using common web technologies, you can actually create pretty good printed documents and even books in WordPress which automatically lay your content out on discrete pages. But if you want more direct control of the design (like setting image sizes, margins and spacing, font selection, etc) you may prefer to export to Microsoft Word, then adjust the design from there.
- For storing, backup, and sharing. Sometimes you just need a self-contained file of your content, either for long-term storage, as a backup, or to share. Exporting WordPress content to Microsoft Word documents is one such option.
If you’ve already written your content in WordPress, hopefully, you can see some situations where you may legitimately want your content as a Word document. But if you’re just starting to write, you may feel that just writing everything in Microsoft Word is better. Let’s review some of the reasons why that’s not the case…
Why Write in WordPress then Export to Word?
If you’re already accustomed to writing in Microsoft Word, or it seems to meet all your needs, why might you want to switch to writing in WordPress?
WordPress is better at publishing for the web. If you want your content to be found and accessible, it should be online. Writing a manual? Book? Whitepaper? Part, or all of it, should be online, indexed by search engines so it can be found, and readable by everyone with a web browser. WordPress makes web-optimized content—e.g., only serving images that are the best size for the current reader’s screen size, collapsing columns on small devices, and making fast HTML search engines love. Technically, Microsoft Word can make HTML pages too, but it’s an afterthought. If you’re content is going to be online (which it should) it should be written in WordPress.
WordPress content is organized and searchable. Similar to how iTunes help organize your music playlists, WordPress helps categorize posts, organize pages in a hierarchy, filter content by author, sort by date, search by keywords, etc.. Microsoft Word doesn’t help organize your files at all. (Most people come up with isoteric folder structures to compensate for this.) Want to see all posts in a cateogry? By a certain author? By published date? WordPress helps finding and organizing your content far more than Microsoft Word.
WordPress is open source and free and always will be. WordPress (the software) is created and maintained by the WordPress Foundation and is free software. WordPress will not increase in price, nor change their terms of use, or sell your data. You can know everything it’s doing behind the scenes, and your writing stays on the computer or server. And if you’re not happy with it, you could switch to ClassicPress (a modified version of WordPress, maintained by a totally separate group of volunteers), or even run your own modified version. There is no dependence on a single corporate giant like Microsoft, who can change their policies, software, and prices on a whim.
WordPress has a huge, supportive community. Nearly half of all websites on the Internet run on WordPress, so it’s a big ecosystem. There is almost no end to the number of tutorials, plugins, WordPress experts, hosting services, and fellow WordPress users. Also, there are thousands of local WordPress meetups, where small groups of users get together to build their skills, and most major cities have an annual WordPress conference (a.k.a. WordCamp). Although there are lots of Microsoft Word users, there is really no sense of community. You’re on your own using it, and there are a lot fewer Microsoft Word professional to choose from.
Lastly, with WordPress’ rise in popularity, many of us prefer its block editor than Microsoft Word’s (or its Classic Editor or pagebuilder like Elementor.)
What Tools Make Word Documents in WordPress?
There are many ways to create a Microsoft Word document from WordPress content. Let’s touch on a few.
Copy-Paste. The obvious solution is to open up a WordPress post, select its content, right-click “copy”, then open up a new Word document in Microsoft Word, right-click on the empty page, and select “paste”.
This is the simplest and easiest when creating a single Word document from a single post or page if your content is mostly just text.
But it becomes laborious if you’re:
- assembling many posts into a single Word document
- adjusting or removing hyperlinks
- adding page breaks between posts
- including other post content (like categories, author, featured images).
You may eventually wish there were a way to automate some of this work—a WordPress plugin. And yes, there are a few.
Aspose.Words is a simple tool for exporting a small number of posts to Word documents. It adds a new “Bulk Action” to the WordPress posts list page called “Export to DOCX”. You can select multiple posts, click “Export to DOCX”, then Aspose.Words will create a zip archive folder with a Word document for each post you selected. Alternatively, it can dump all the selected posts into a single document.
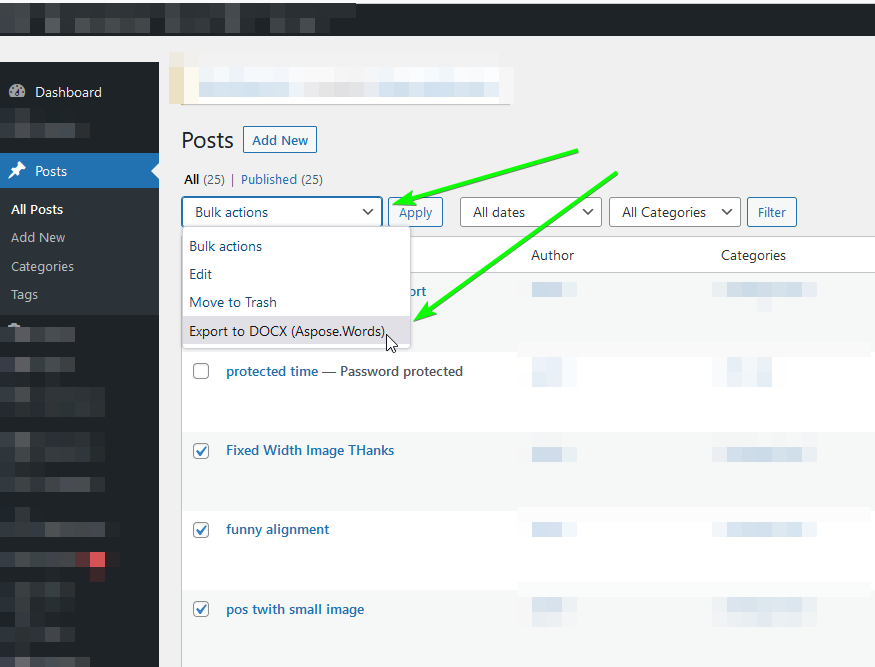
It can similarly export pages and other custom post types, however you cannot combine posts and pages into a single export.
There are a few options to customize what data gets included in the generated Word documents, and you can control how the included posts are ordered.
It does become difficult to export more than a handful of posts, however, because of the simple interface. You can only export as many posts as you can select at once (the default being 25), and you can’t manually order them.
Still, given this plugin is free (it just requires signing up for a free Aspose account), it’s a fine choice if it meets your needs.
MPL-Publisher is more advanced and better suited to creating books or other compilations of posts. The plugin lets you select posts, pages, and other content into “books”, order them, add chapters, then export them to a single Word document (among other formats like PDF, ePub, and audio file). You can choose between a variety of designs and settings for each.
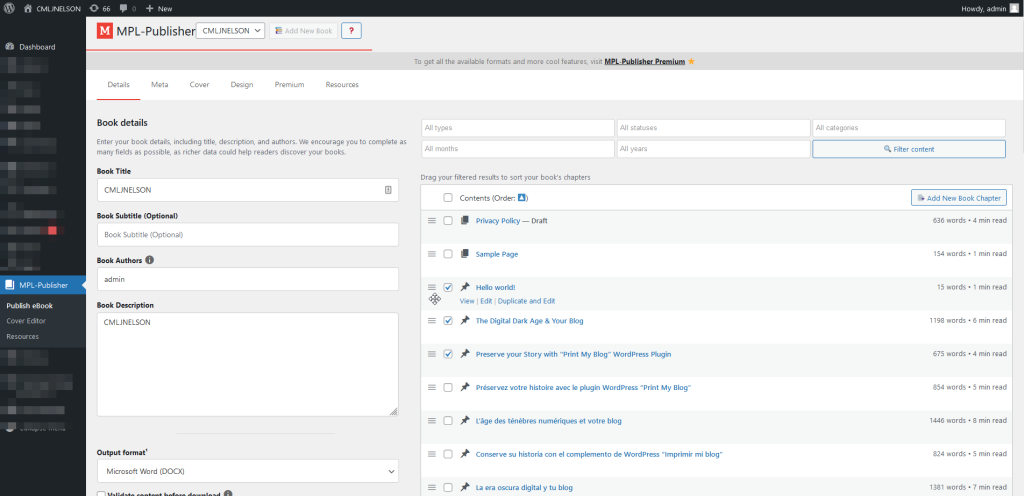
Exporting to Word documents is included in the free version of the plugin, but there are other features you may want that require payment.
Print My Blog (PMB) is also well-suited for creating books or compilations of posts but more users have tested it, has more documentation, and a number of other advantages.
For example, when creating Word documents, it allows you to:
- group content into parts
- customize and reuse the design (like choosing what content to include on the title page and main pages, and what quality of images to use)
- change hyperlinks to point to the corresponding page of the document rather than the webpage (or removed entirely)
- and include custom CSS styles.
Developers can additionally create their own designs and templates, or even customize how the WordPress HTML content is converted into a Word document (written in XML.)
Creating Word documents with Print My Blog requires a current Pro subscription.
The rest of this tutorial will assume you’re using Print My Blog.
How Do I Use Print My Blog to Make Word Documents?
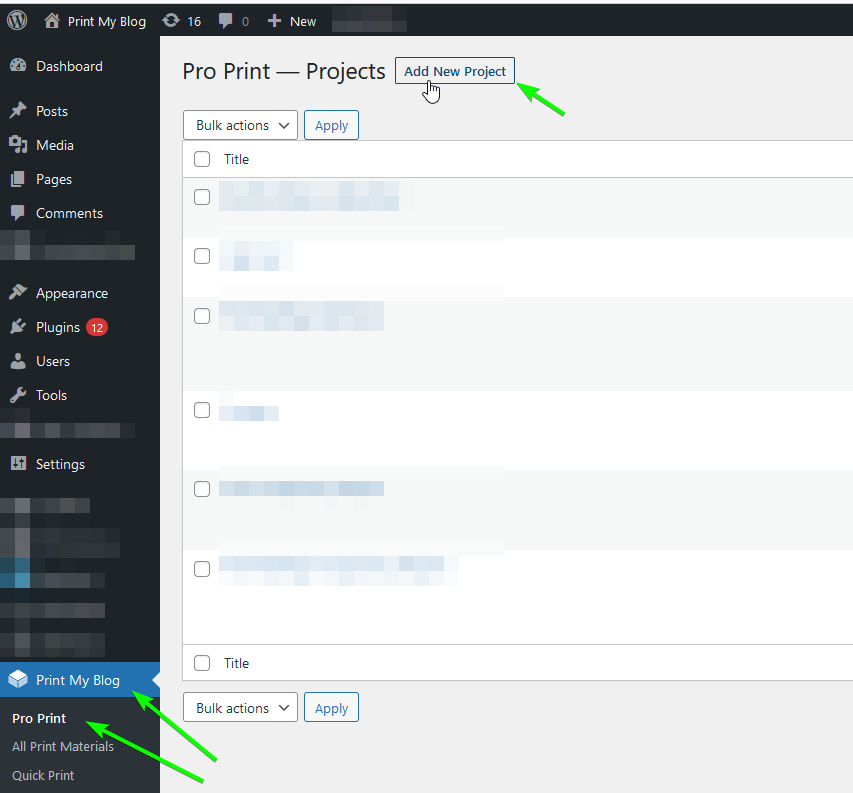
Once you have purchased a Pro license for Print My Blog and the plugin is installed on your site, in the menu on the left, go to Print My Blog » Pro Print. Click Add New Project. Projects are how you organize the groups of posts (pages, custom types, etc.) to convert into Word documents and other formats.
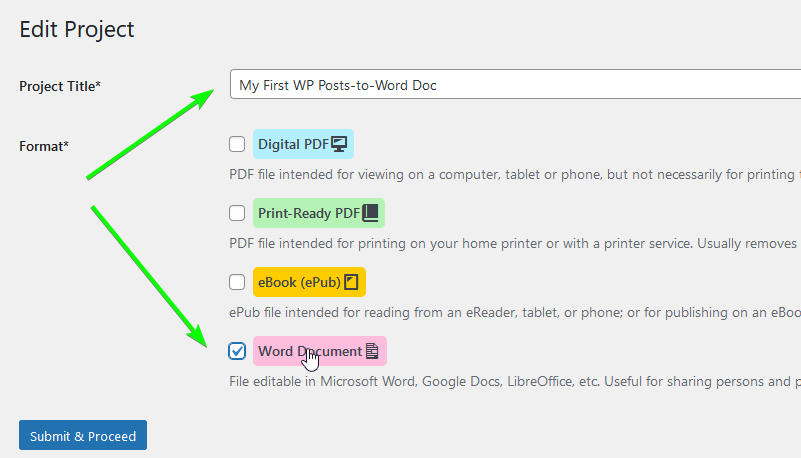
This is the project setup step. Select a title, uncheck Digital PDF, and check Word Document (the other formats are useful too, but for now we’re just focusing on Word docuemnts.) Click Submit & Proceed.
Now you can choose the design of your document. The design controls how your posts’s content is converted into a Word document, and can affect how the generated Word document will appear. For most file formats there are multiple designs, but currently, Word document only has one. Click Use The Design to use it with its default settings, or Customize to see all its settings and change them.

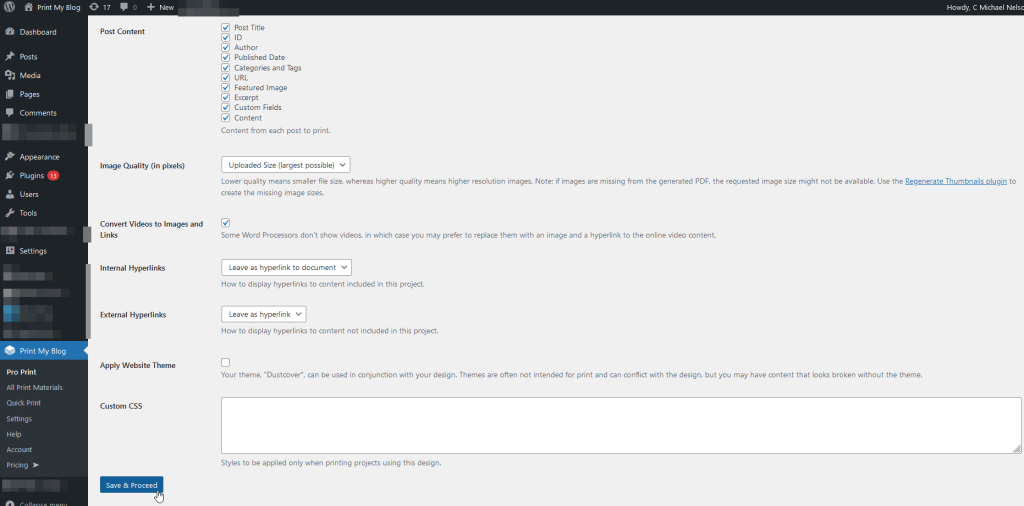
If you chose Customize, you will see a page of settings. Choose your design’s settings: what content to include on the title page, what content to include from each post, image quality, etc. For more details on these settings, see the Classic Word Design’s documentation. Click Save & Proceed when done (reminder you can come back to this step later.)
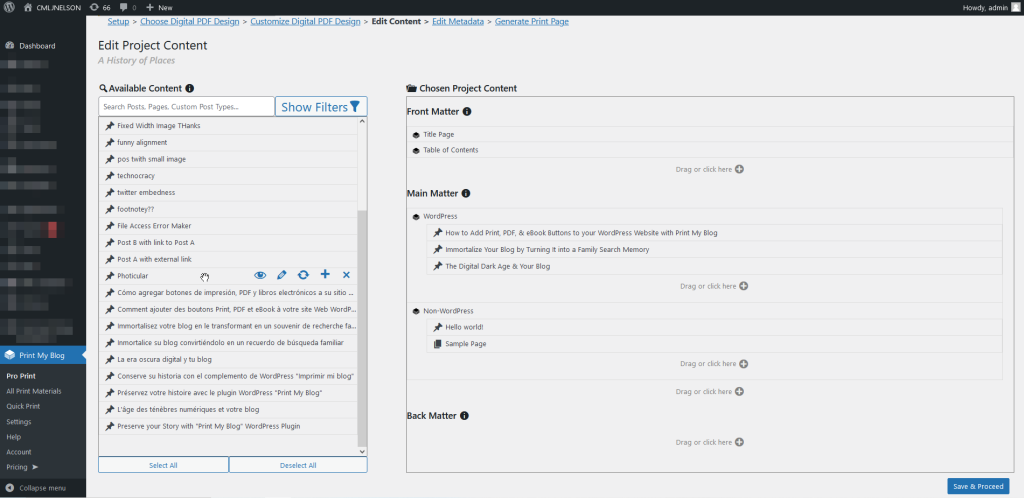
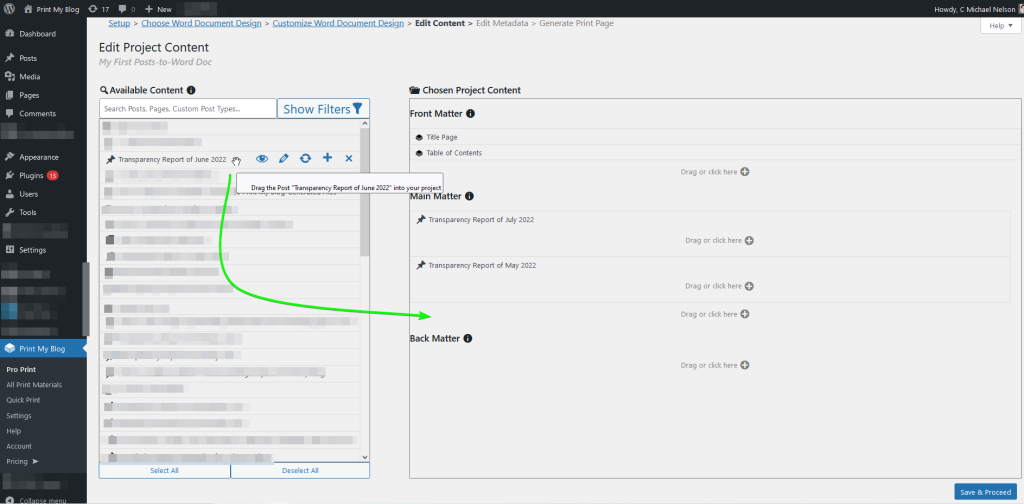
Now on the Edit Project Content step, you get to choose which posts, pages, and custom post types to include in your project, in what order, and how to structure them.
Drag the posts and other content on the left into your project’s content on the right—moving “Available Content” from your site into your “Chosen Project Content”. Front Matter is for introductory materials (like “About this Book” or “Introduction”), and Main Matter is where most of your content should go (chapters or articles), and Back Matter is for supplemental materials (like “Suggested Reading” or “About the Author”). The design may display content in each of these areas differently (like usinf roman numerals for front matter).
Use the search bar on the top-left and the “Show Filters” button to find specific content, and the “Select All” button in the bottom-left then drag over everything into your project. This project editor is more extensively explained, with examples, in our documentation. Click Save & Proceed in the bottom right when done.
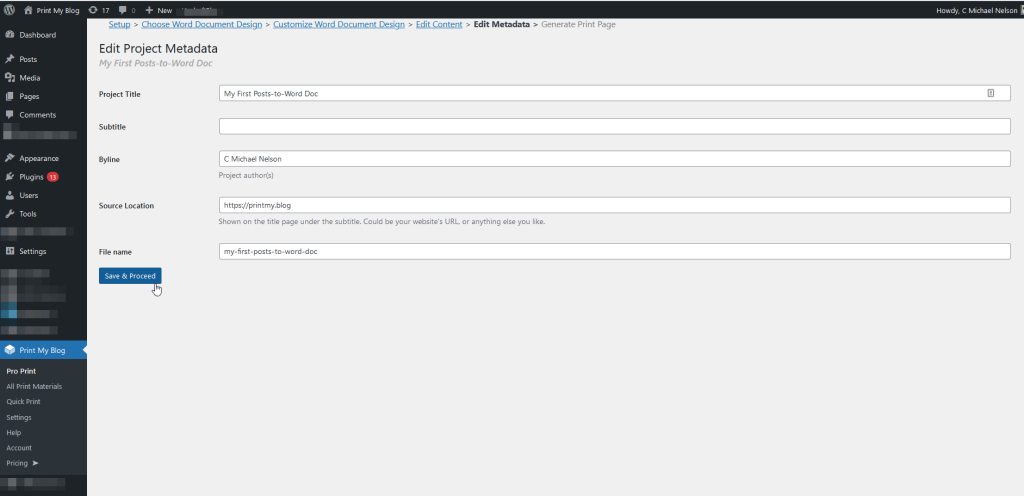
After that, there’s one last step: Edit Project Metadata. This is usually a short form of info about your project. This information might be used in the title page, running headers, file metadata, etc. Fill out the fields and click Save & Proceed.
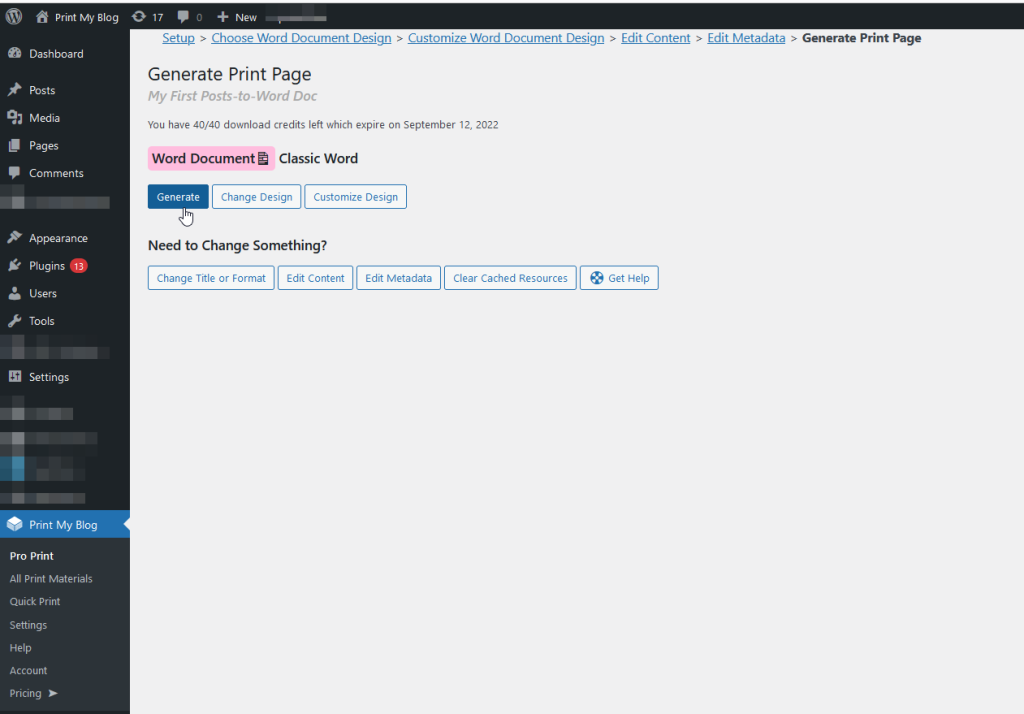
After all this, you are ready to create the Word document. On the Generate Print Page step, click the Generate to see a webpage with all your project’s contents. (Note: you can use the links on this page to make changes to any of the previous steps.)
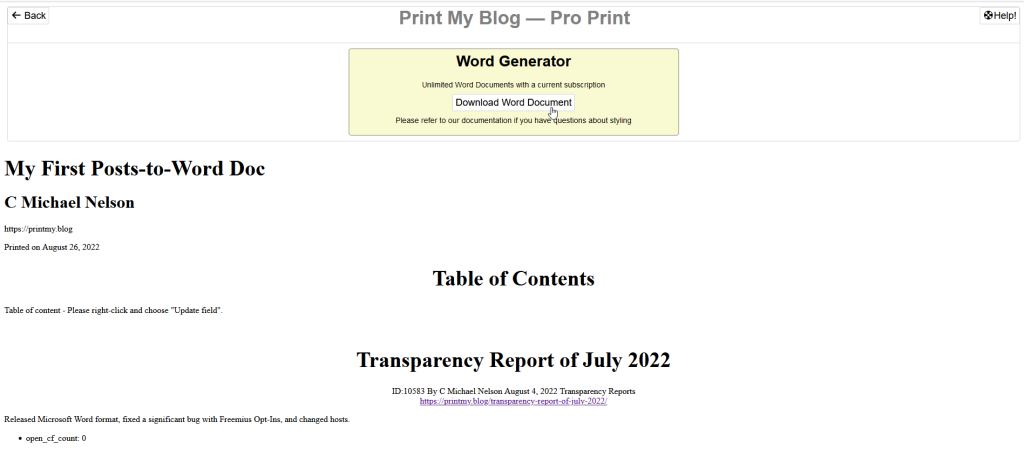
On the next page (the “Print Page”), you can see all your project’s contents from your browser. Click Download Word Document once it’s enabled (the page might be busy for a few moments with a few last-minute preparations.) A Word document will be downloaded to your browser’s downloads folder.
Open the Word document using Microsoft Word (or LibreOffice, or any other word processing program.) Click Enable Editing to make images appear and make changes. Before you do this, Microsoft Word cautiously disables some of the content―don’t worry, it’s safe. Microsoft Word wasn’t aware you created the document. The document is safe to edit.
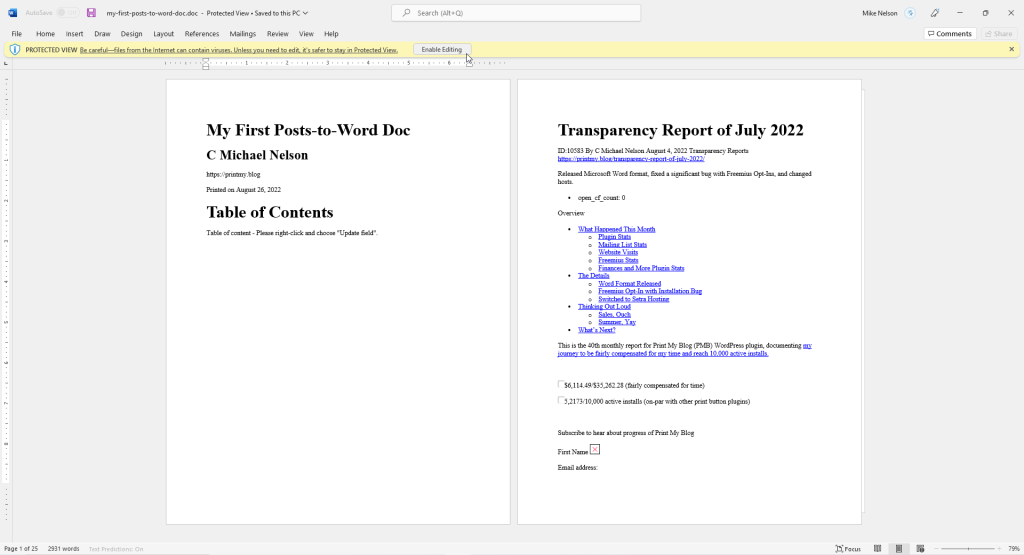
Initially, the table of contents will be blank. Press Ctrl+a (or Cmd+a on Mac) then F9 to update the table of contents.
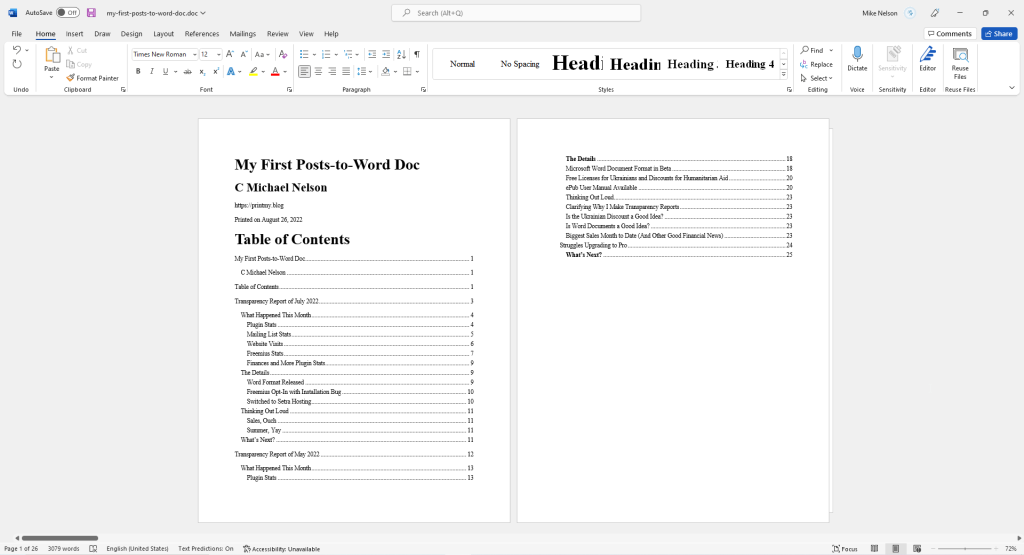
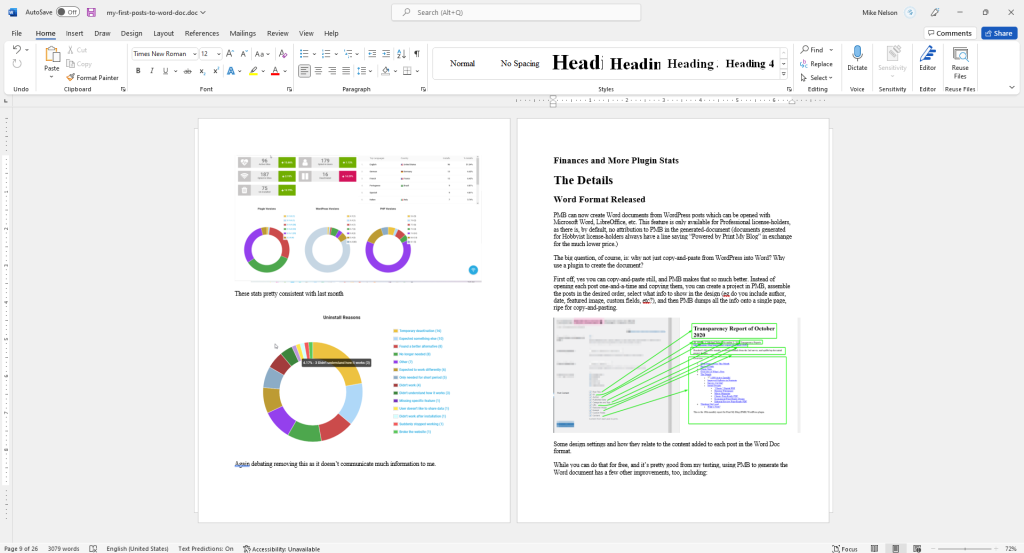
Now, with the Word document in hand, it’s a good chance to review it before sending it to someone or storing it. In doing so, you may notice some things you’ll want to change. Let’s talk about the best way to update the document…
What’s the Best Way to Update the Word Document?
What if, after creating the Word document from WordPress content, you realize you need to change some wording or make other changes?
The main pitfall you want to avoid is unnecessary duplication. For example, it’s a pain to need to fix all typos in your WordPress posts and in the Word document. It’s much better to fix them in the WordPress posts then re-generate the Word document from that, rather than making the changes to the Word document. This way you’ll avoid needing to change both your website and the Word document when there is a change to be made.
If you need to make the Word document’s wording a little different from the original post or remove elements from it but not the original post, use Print My Blog’s shortcodes or CSS classes. With them, you can make parts of a post different on your website than in the generated Word document. This is much more convenient than manually editing the Word document after generating it each time (because despite whatever you initially think, you will probably want to regenerate the Word document a few times.)
The only time you should be directly editing the Word document is to make final design adjustments, like resizing images. But this can be time-consuming so you only want to do it once, not every time you fix a typo. For that reason, be sure to first proofread your work and make any adjustments to the content choices before doing the lengthy manual formatting in Word.
When Should You Not Make a Word Document from WordPress Posts?
In some situations, there may be better ways to accomplish what you need without creating a Microsoft Word document which might be worth considering.
Printing out your posts with your home printer may be better served by instead exporting your posts to a print-ready PDF. Print My Blog can do this, and the file won’t require manual tweaking in Microsoft Word. It can also automatically replace hyperlinks with page references and footnotes, convert YouTube videos into screenshots with a URL, and even automatically adjust image placement and size to avoid whitespace.
Creating a book and eBook for sale on Amazon can instead be an ePub file (for the eBook) and print-ready PDF (for the print-on-demand book). Print My Blog can have a single project be exported to multiple file formats, each handling the design differently (e.g., removing hyperlinks in the PDF but leaving them in the eBook; using large images in the PDF but smaller ones in the eBook, etc.)
Reviewing and editing will be more streamlined by keeping the feedback in WordPress or in a physical printout. The Multicollab plugin lets you add inline feedback to posts that are viewable only to authors, very similar to Microsoft Word’s Review mode and Google Docs’ comments.
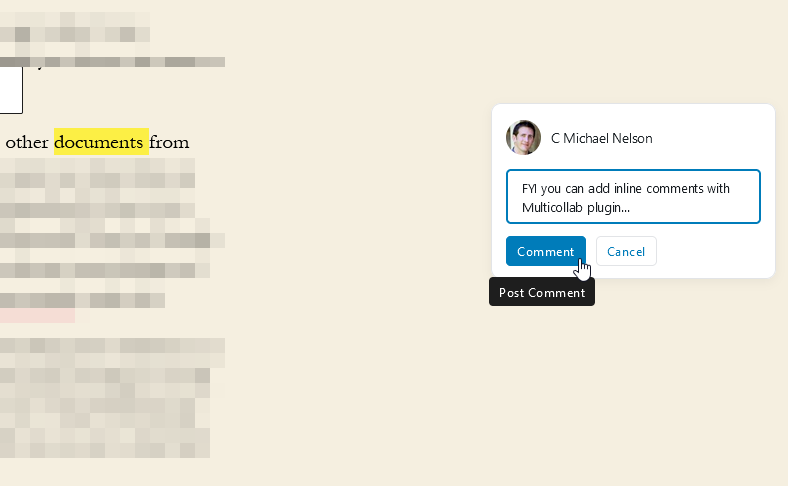
For those willing to try using WordPress’ plugins (especially if you’re willing to work with the plugin authors to add the features you need) you may find exporting posts to Microsoft Word isn’t necessary.
In Conclusion: WordPress ❤ Microsoft Word?
WordPress can quite easily be used as a total replacement for Microsoft Word or in conjunction with it. Even if others expect and require Microsoft Word documents, there are advantages to using WordPress and exporting to Microsoft Word as needed.
Please let me know if you have any questions about using WordPress with Microsoft Word.

3 replies on “How to Make Word Documents in WordPress”
[…] have hoped. Basically, PMB never quite laid out the images as well as he wanted, and he ended up exporting his posts to Microsoft Word and hiring someone to help finish it up and get it on […]
Just bought pro version, which does most of what I want (largely chart formatting) – but thought I’d experiment with exporting to word as well (I might want to add some custom branding that I can’t see how to do).
But when I generate the nicely formatted webpage as described here, there’s no option to download a word doc – only to print the test pdf and then actual pdf. Am I missing something?
Many thanks
Matt
Hi Matt, I think you missed enabling the “Word Document” format on your project. On the project’s first step, “Setup”, you choose the project’s name *and what formats to use*. You need to make sure that “Word Document” is checked there.