Overview
Should you make a printed user manual, a PDF user manual, or an online webpage manual? It’s a trick question. The correct answer is “all of them at the same time!” In this tutorial, I’ll show you how I did that on a self-hosted WordPress website. I first used the plugin BasePress to create an online user manual, then I used the plugin Print My Blog to make print and PDF copies.
Why Make a Manual in Different Formats?
Some folks think just a website is enough. Others think they can get away with just putting a PDF online. And others are still don’t “do the internets”…
Who Reads Print Nowadays?
Most of us! And besides just books, it’s always convenient to get a low-tech, physical manual with any thing purchased.
You’re probably reading this online, but not everyone is online all the time. Lots of people make a living (and sell stuff) totally offline. Print converts better. While print is no longer the only format we use, it’s still a major one. By not offering print copies of a user manual you’re missing out on a major portion of readers (many of whom are the big spenders too).
Who Reads Online Manuals?
When we’re searching for answers, we search online. If your user manual’s content isn’t online people will miss it, possibly finding your competitors. And no, most of us would rather not read an entire PDF when searching for a specific answer.
And please don’t try to put your user manuals information on your Facebook page. We’d gladly pay double than try to read a mess of photos or scans of your print manual.
Then Who Reads PDFs Online?
Businesses seem to love them. They’re great for sharing with executives who don’t want to be bothered with logging in or navigating a website or dodging pop-ups. A digital PDF user manual, stored online and locally, is more likely to be available than a website which may go down and the printed manual gets lost.
If someone has spent money on your product, they will legitimately expect to have reliable access to its manual, which a PDF promises.
Consider Context and your User
Some users feel more at home reading print, others online. And for most of us, it just depends on the situation. But forcing us to always use one format is a disservice, especially if we’re paying money.
I know historically we’ve had to choose one format over another, or pay three times as much to create a manual in all three formats. But in this tutorial I’ll show you how to create for each format simultaneously.
Why Use WordPress
Are there other ways to make a web/PDF/print manual? Sure, let’s look at a couple…
Microsoft Word, Google Docs and Apple Pages are the default choices for creating documents, but won’t help you make an easily accessible online version. It will take a lot of copy-and-pasting and fixing formatting to create it (not to mention everytime you need to update it.) So really, each of these only offers half the solution.
ReadTheDocs is popular among software developers. It’s free for open source projects and will similarly make all three formats simultaneously. If you’re familiar with Markdown, a VCS like Git, and Sphynx, it’s a very promising choice. But I’d avoid it if those terms make your head spin or you’d rather keep it on your own WordPress website.
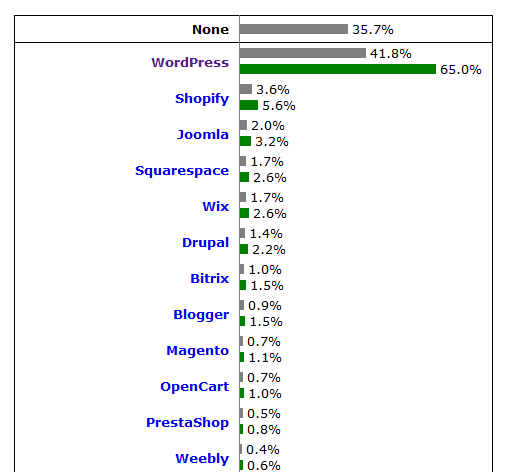
Over 40% of websites online use WordPress, so it’s an obvious choice for creating the online user manual. And, with the right choice of plugins (there are over 50,000 of them) it can also take care of making the print and PDF versions too.
Why use BasePress and Print My Blog Plugins?
The steps of this tutorial can be adapted with other documentation/knowledge base plugins, or eBook-creation plugins. Here’s why I’m using BasePress and Print My Blog.
BasePress is Great for Making User Manuals/Knowledge Bases
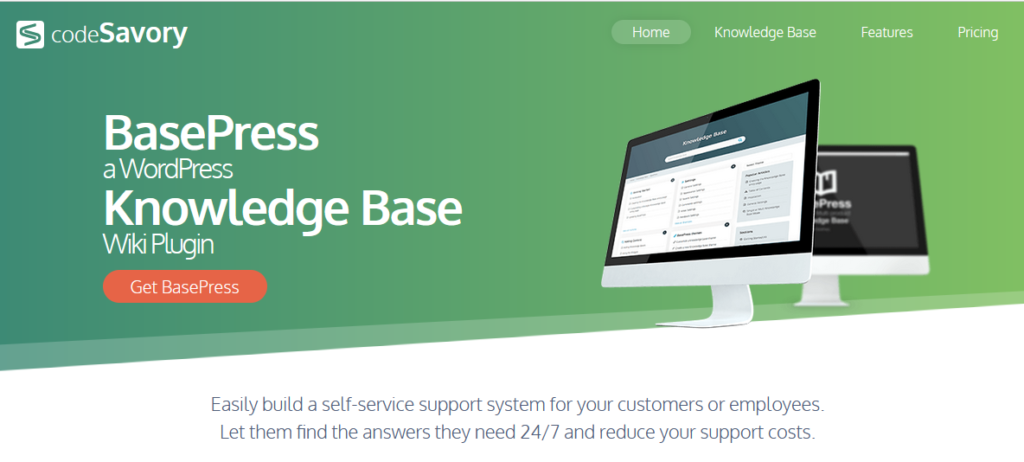
BasePress is easy to set up, use, and read; looks good; and has both free and paid options (I just use the free version in this tutorial, but the paid version indicates its developer has a business model too.) To top it off, its users are really happy and its developer is very helpful.
You can, of course, simply create all your user manual as pages on your website, which requires no plugins at all. But, besides missing out on a lot of useful features, your content will get disorganized really quickly. I thought it better to use pages for forms (like my contact page and purchasing page) and content about my business, and use BasePress’ knowledge base articles for instructions on how to use my product.
Print My Blog Excels at Print and PDF
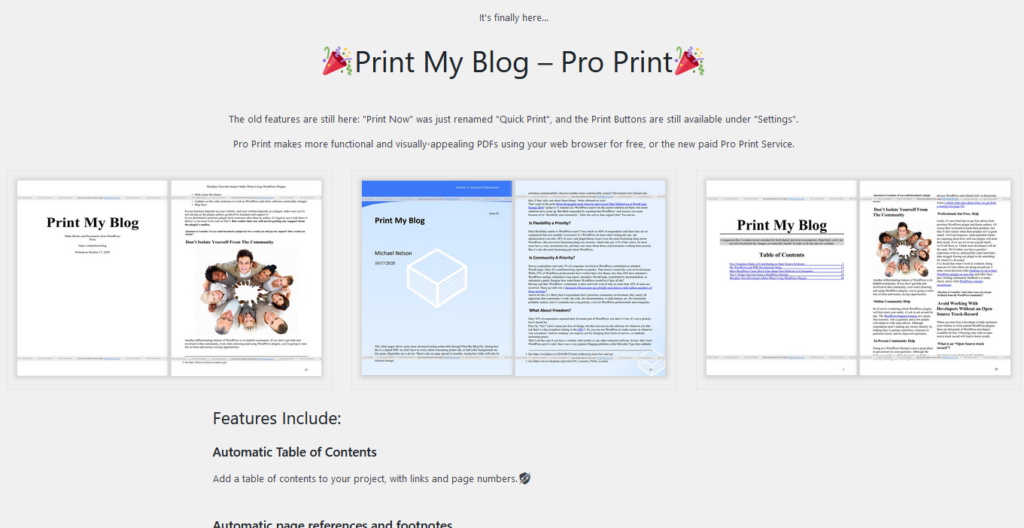
I’m the developer of Print My Blog, so of course, I think it’s best. It’s one of the few that supports custom post types (ie, content other than just posts and pages), fully customizable designs (eg changing the PDF’s branding), and integrates very well with the new WordPress Block Editor and content from other plugins. So far, it’s been very well-received by users, and I try my best to be responsive to support requests. It likewise has free and paid options.
Could I have just copy-and-pasted all the content from the website into Microsoft Word or Google Docs? Of course, but besides being a headache to copy-and-paste each item, and reformat, and repeat each time I made an update, I would miss out on a lot of intelligent features (like automatically updating hyperlinks to cross-references and footnotes, intelligently converting videos into screenshots and links, and adjusting images to reduce empty space.)
Steps to Creating an Online, Printable, and PDF User Manual
The first main step is to create the online User Manual using BasePress, then convert it to PDF and print with Print My Blog.
Step 1: Create the Online User Manual
Setting up and using BasePress is pretty straightforward and well-explained in their documentation, so I’ll mostly give an overview of it.
First install BasePress using either your WordPress website’s “Add plugin” page or by downloading it for free from WordPress.org.
BasePress comes with a great setup wizard that guides you through the few steps, and it will all be set up in a couple minutes. Their documentation uses BasePress too, so reading it is also a demo!
I created
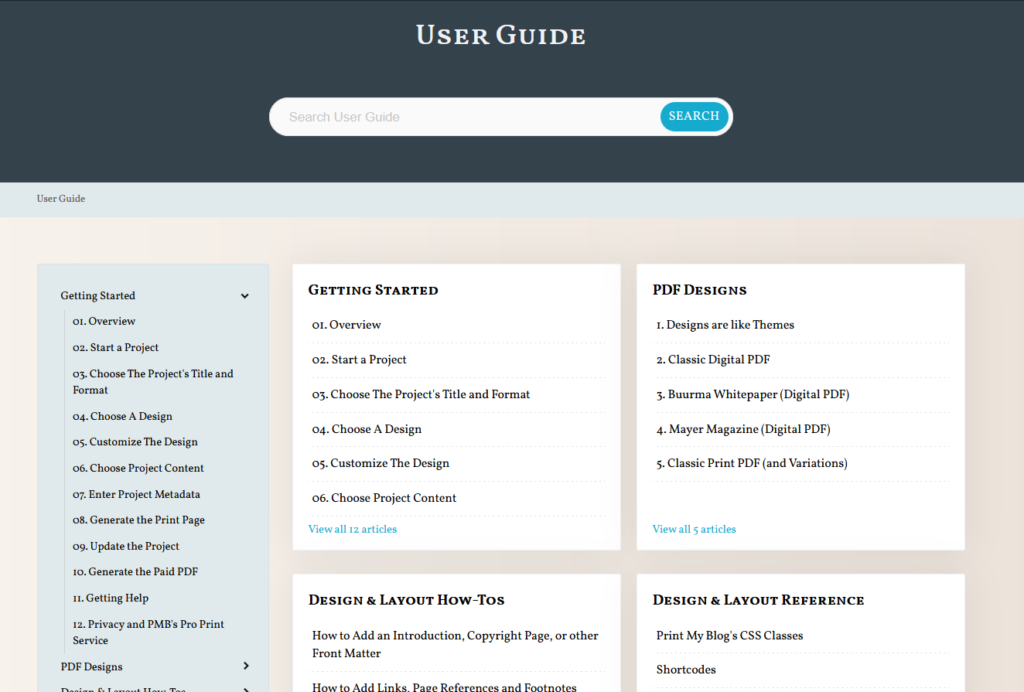
- a page to show the user manual (aka “Knowledge base”; it can support more than one but I didn’t need that yet)
- a single knowledge base, just renamed it “User Manual”
- sections for “Getting Started”, “Design and Formatting How-Tos”, “Reference”, etc.
- articles to each section. Eg “Getting Started” has an “Overview”, “Start a Project”, etc.

The free version doesn’t support ordering each article, which I overcame by just adding a number to the start of each article’s name, then ordering them alphabetically.
Check out my User Guide, built entirely with BasePress.
Step 2: Convert to PDF and Print with Print My Blog
Install Print My Blog via your WordPress website’s “Add New” plugin page, or download it for free from WordPress.org and then upload to your site.
Next, you’ll want to create a new “project” in Print My Blog. A project has a title, a format, your chosen content, and some other metadata.
You can create all that with the free version, and export a watermarked demo using the paid Print Service. You can alternatively use your browser’s print and PDF abilities for free, but they don’t support some features (like full control of page margin content or cross references.)
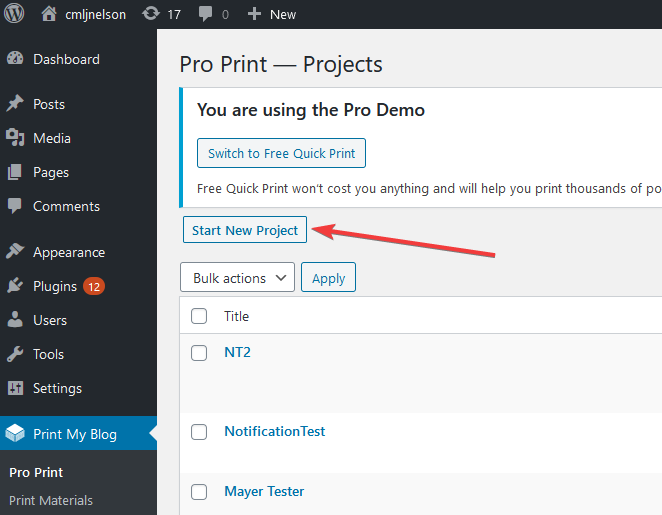
To start a project, under “Print My Blog” menu, select “Pro Print”. Then click “Start New Porject”.
Give the project a name, like “User Manual”. This name is mainly for you to distinguish it from other projects you might make later.
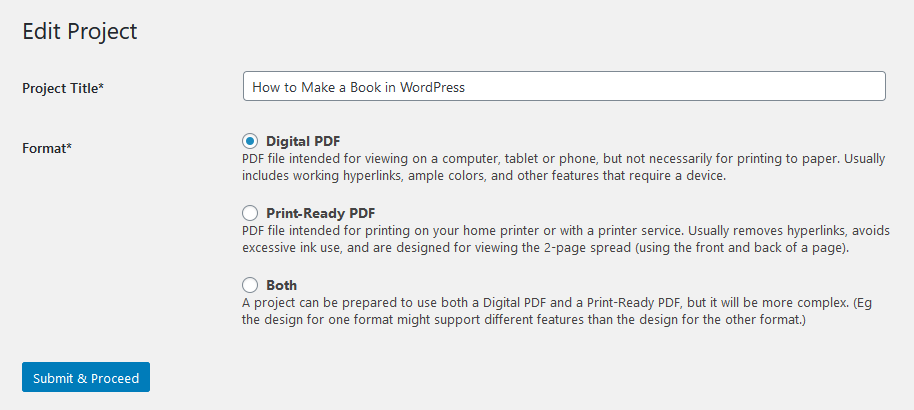
Next, choose a format. If you want to make both a digital and print-ready PDF, select both. If you only want to print it, or send it to a printing service like lulu.com, or sell a physical book, use the print-ready PDF. If you want to share a PDF users will usually just read from their device, a digital PDF will probably be better.
You can then choose a design for your format. Designs are like WordPress themes: each has their own look and options, and designers can even create their own. You can change the design or it’s options later if you don’t like it by using the breadcrumbs at the top of the page.
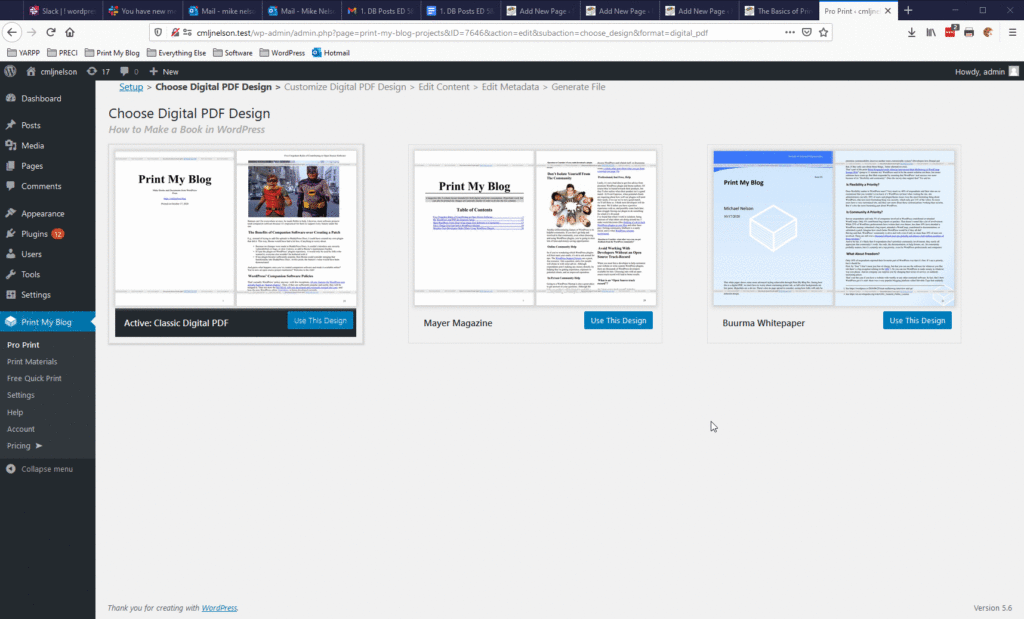
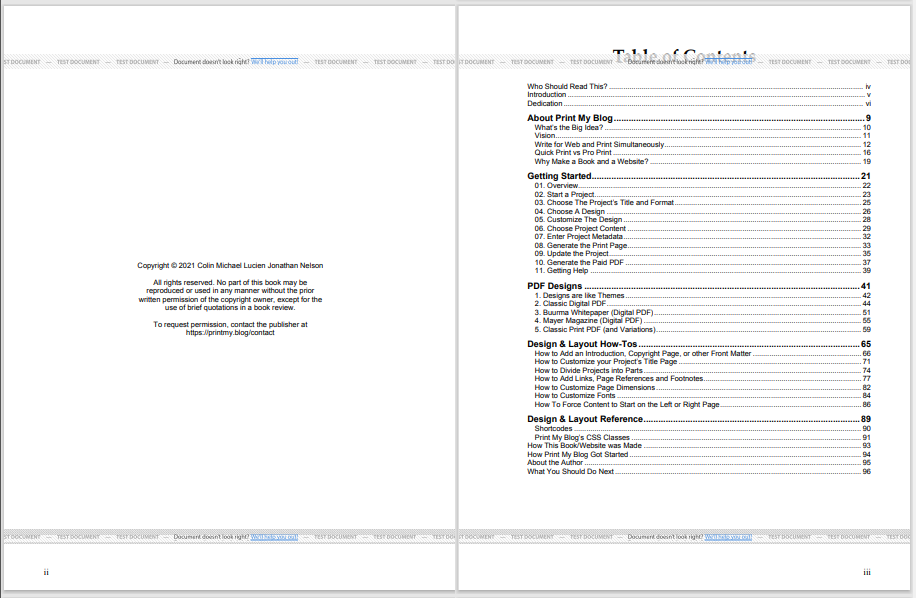
When choosing your project’s content, make use of the filters and search options. The classic design I chose supported adding front matter (introduction, etc), dividing the main matter into sections, and back matter (about the author etc).
To add new front matter, click the “Click or drag here” below the front matter. This will add print-only materials (they don’t appear on your website, only in the PDF.)

To add a section to the main matter, click the “Click or drag here” under main matter. I created a part for each knowledge base section I made earlier with BasePress.
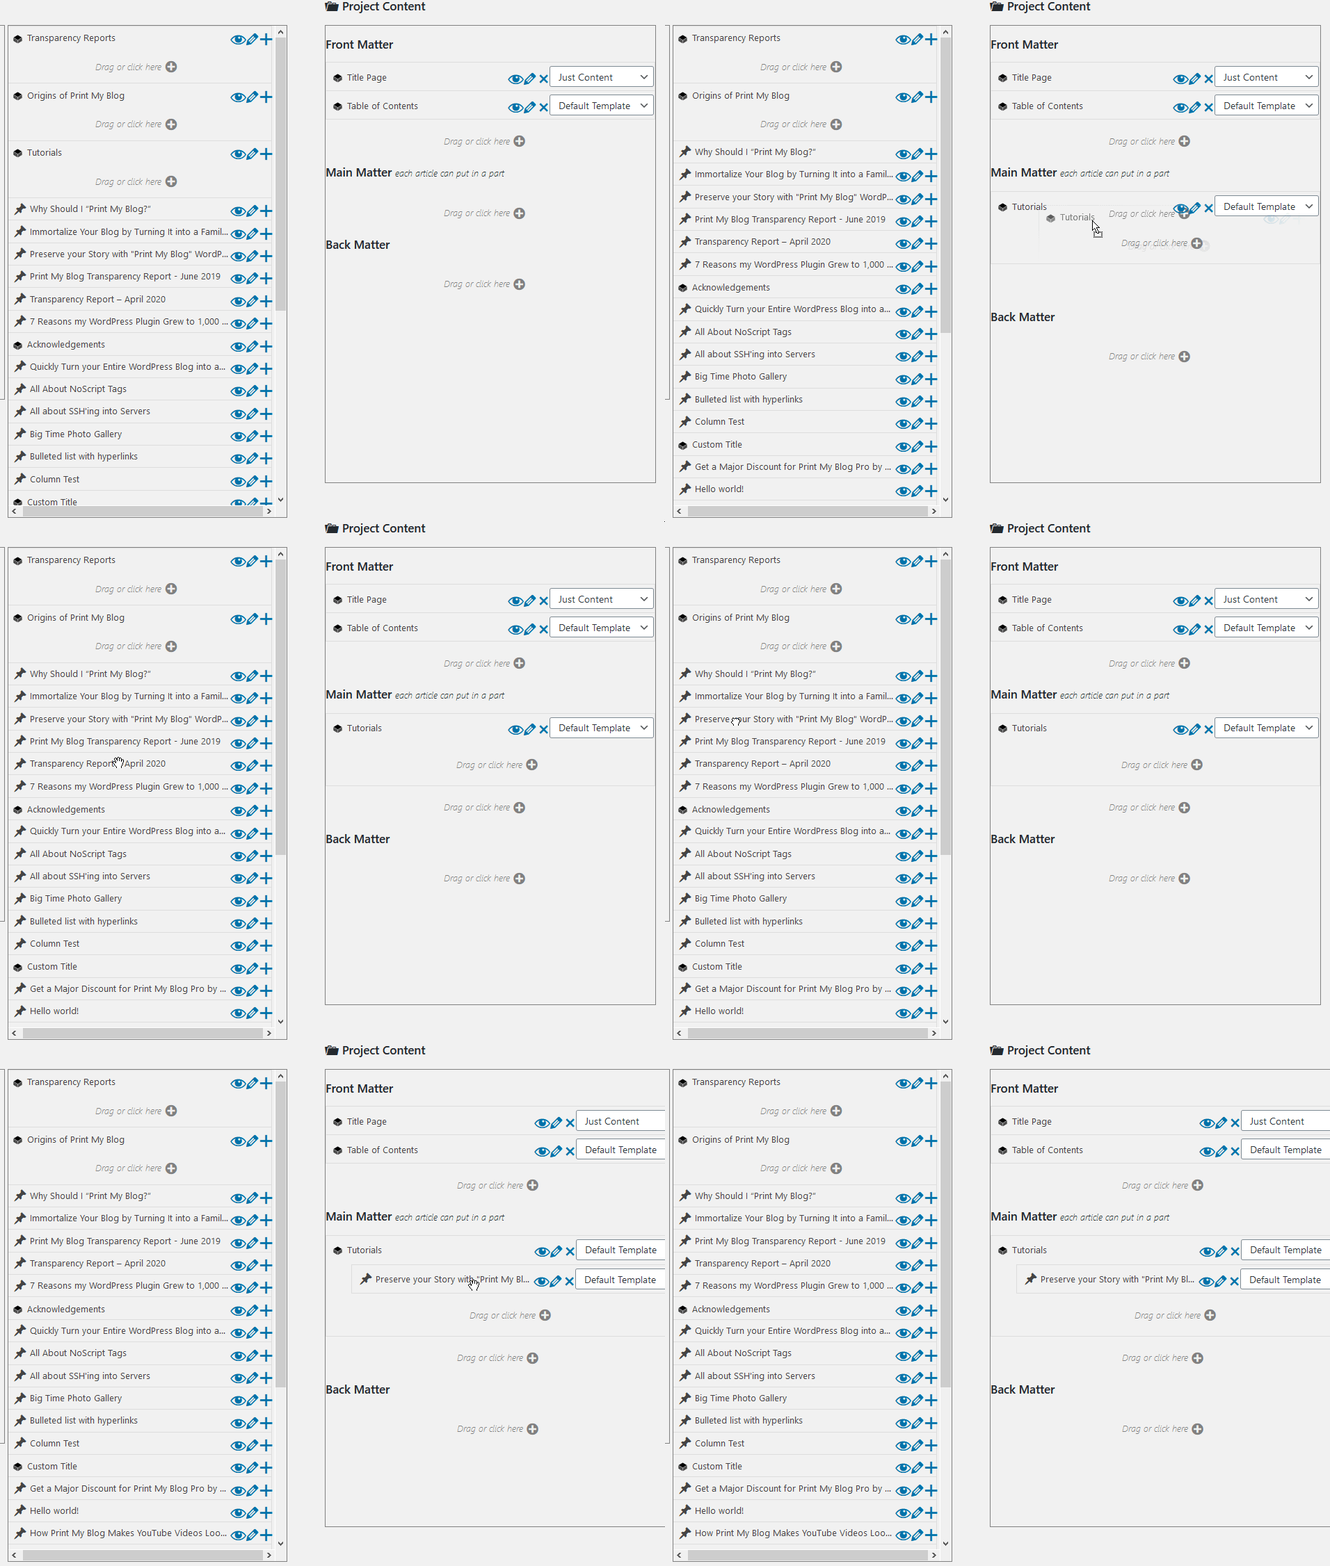
I then used the filters to only show “Knowledge Base” articles (from BasePress) and the filter by each “Knowledge Base Category” (elsewhere known as “Knoweldge Base Sections”, eg “Getting Started”). Then I just dragged each article into the project below the desired section.

I also added some posts and pages to the project I thought relevant (like an overview page, and will probably add tutorial blog posts like this in the future too.)
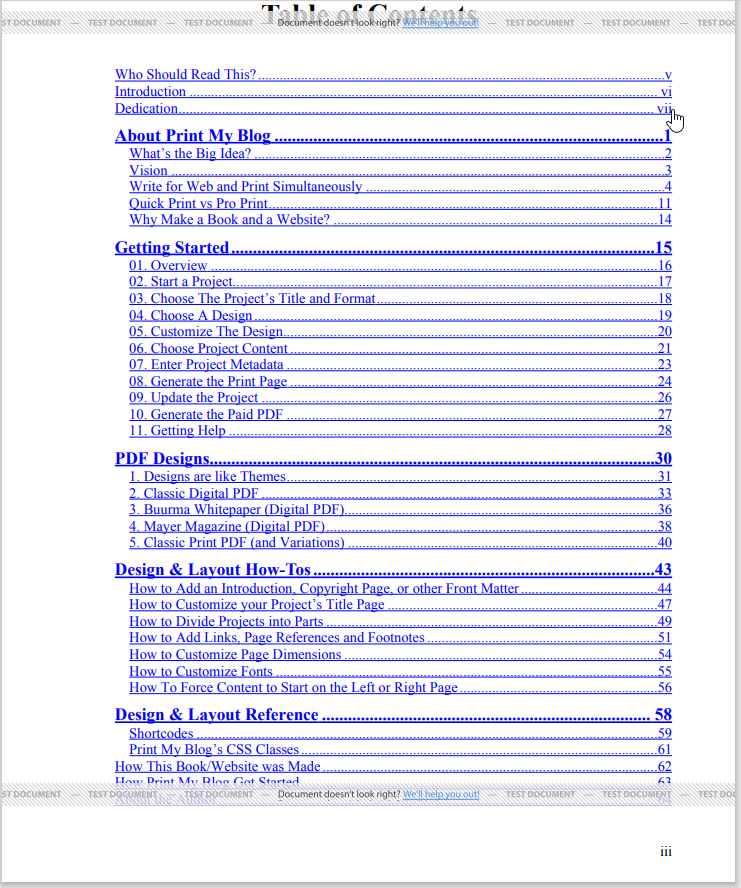
I mostly skipped the metadata step (the defaults were fine) and then generated the PDF and downloaded it.

I can then use that PDF for printing or sharing with others. I’m going to use lulu.com to print a book and mail it to my business users, and share the digital PDF with my professional users.
Step 3: Updating and Adjusting Stuff
Aren’t we done already? Realistically you’ll want to fix typos, add sections, and update content. If you had copy-and-pasted from Microsoft Word this would be a pain, as you’d need to meticulously ensure you made all those changes to both the website and content (and adjust formatting each time.)
With Print My Blog, just make the changes to the content in your website (eg the knowledge base articles or posts included in the project), return to the “edit content” step of the project to add, remove, or reorganize content, or return to “choose design” or “customize design” steps to modify the style of the PDF.
Using Print My Blog streamlines creating and maintaining a user manual in all the formats making it as accessible as possible to your various users and contexts in which they will use it.
Let Users Choose Their Preferred Format for your User Manual
Restricting your user manual to only one format will always ostracize some users. Those who are always online will prefer it on a website (so will search engines). Users who aren’t “computer people” will probably still prefer a print version (so will anyone you meet in-person). And it’s often users will appreciate a digital PDF they can save to a device but still access offline. Creating all these formats directly in WordPress can be easy using the right tools.
Want to see my online/PDF/print manual for Print My Blog? Check out the online manual for free, or buy a professional license to get the digital PDF, or buy a business license to get the print manual mailed to you.
Questions? Please let me know and I’ll do my best to answer them.
3 replies on “Making a User Manual for Web, PDF, & Print with WordPress”
[…] a few posts and pages, and a few extra print materials into a printed book: the PMB Pro Manual. I wrote a tutorial all about it. I sent it for printing with lulu.com for pretty cheap (almost 200 pages, and printing costed about […]
[…] And if you like the look of Heredis’ knowledge base, they’re using the Corpus theme and uses posts and pages. (Which is a bit different from how Print My Blog’s User Guide is made.) […]
[…] visitors is up slightly, but they’re viewing fewer pages. My post on Making a User Manual for Web, PDF, & Print with WordPress continues to be my most popular post; the largest portion of my traffic comes organically from […]