Overview
Print My Blog (PMB) 3.11.0 quietly introduced a new feature: dynamic image resizing. PMB 3.12.0 made using it a breeze. So what is dynamic image resizing and why would you want it?
What Is Dynamic Image Resizing
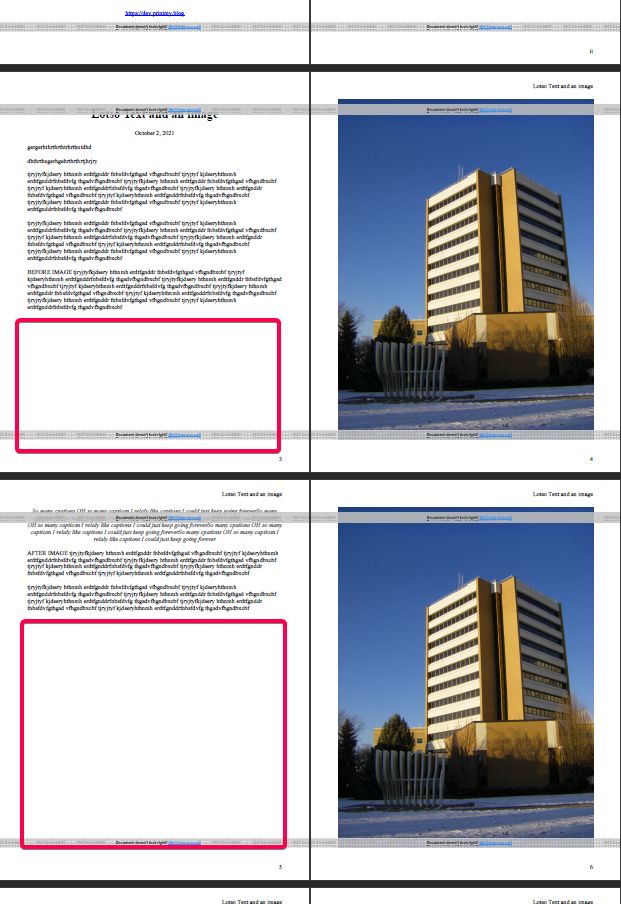
One of the biggest troubles when printing out WordPress content is avoiding whitespace. Wouldn’t it be great if you could have PMB automatically shrink images to fill in that whitespace (provided they wouldn’t be too small, of course)? That’s what dynamic image resizing is!

How To Use It
First, you need to be using a design that has the “Image Placement” setting—the Classic Digital PDF and Classic Print-Ready PDF are two of them.
Find your project and go to its “Customize Digital PDF Design” or “Customize Print-Ready PDF Design” (whichever you’re using―if you’re using both, go ahead and do this for both.) Then expand “Image Settings”.

For the “Image Placement” setting, set it to “Resize images if they don’t fit on the page.”

You’ll see another setting appear, “Minimum Image Size (in pixels)”. Any image bigger than this (that’s not part of a gallery or in column blocks) will be shrunk as much as necessary in order to fit on the page they’re originally placed on, provided they won’t be smaller on this. So if it’s set to 300 (pixels), any image over 300 pixels tall will be “dynamically resized”. And when resizing them, they’ll be at least 300 pixels tall. If there’s not 300 pixels of space on the page, they’ll be bumped to the next page.

Some Samples
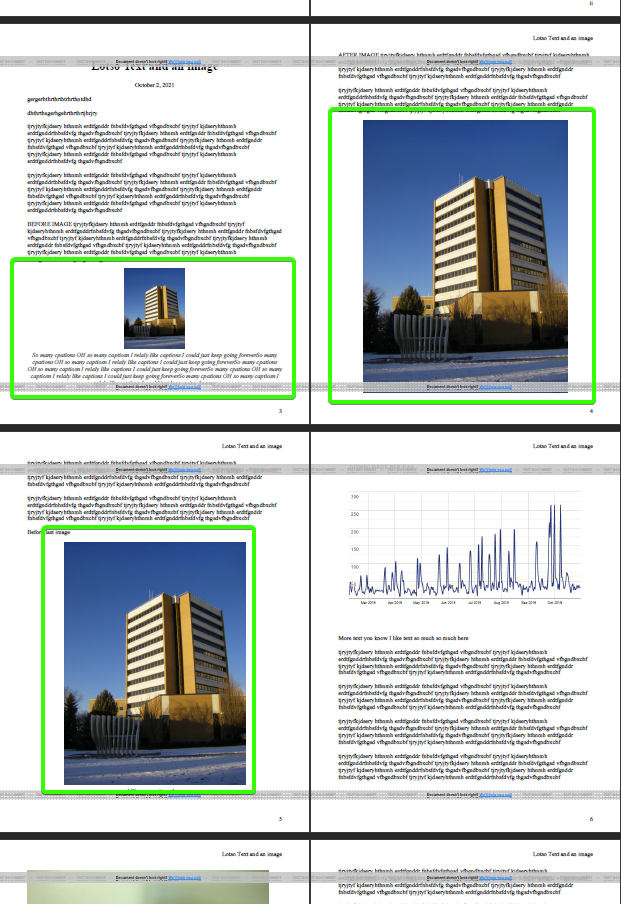
It might help to see dynamic image resizing in action. One important thing to note: when you set the minimum image size, that size will take the image’s caption into account. So if you set a minimum size of 300 pixels, it will squeeze the image and caption into 300 pixels; if there’s not 300 pixels of space left on the page, it will be bumped to the next page.

Dynamic image resizing works well on left-aligned or right-aligned images as well, arguably better. Even the whitespace beside the images can usually be totally removed when using images that float to one side or the other.


A few Important Notes about Dynamic Resizing Image
Dynamic resizing images doesn’t apply to galleries or images inside column blocks. For the best layout with these, you’re probably best adding the CSS classes pmb-float-top or pmb-float-bottom to allow text to flow in front of them to fill in whitespace.
Dynamic image resizing will also not stretch images beyond their natural size. For example, if you upload an 500x500image to your website and use it in a project, and are using dynamic image resizing, that image will not be stretched longer than 800 pixels tall. Doing so would always look pixelated. Dynamic image resizing will only shrink images to make them fit onto the page.
If you would like to see which images are being dynamically resized, you can add the following CSS to your design:
.pmb-dynamic-resize{
    border:1px solid red;
}
.pmb-dynamic-resized{
    border:1px solid green;
}
This will put a red border around images before they are resized and a green border after they are resized.
Lastly, if you want an image to be an exception and dynamically resized it, add the CSS class pmb-dont-dynamic-resize onto it.
How To Use It in Conjunction with Maximum Image Height
The setting “Maximum Image Height (in pixels) can be used alongside dynamic image resizing (in designs that have this setting, like the Classic Digital PDF and Classic Print-Ready PDF).

By setting a maximum and minimum image height, you can a set a range for acceptable image sizes in your documents, so they don’t look too big or too small.
The only exception is images which are naturally smaller than the minimum image size. Like mentioned earlier, images will not be stretched. So if you’d like a small image to become bigger you will need to upload a higher resolution image to your website to replace the lower resolution image you currently have.
Conclusion
Dynamic image resizing can be a useful tool to remove dead whitespace from your documents created in PMB and I hope you find it useful. Please let me know how it works for you and if you have any suggestions on how to improve it further.

3 replies on “How to Have Images Dynamically Resize Based on Remaining Space on the Page”
Very cool! Nice programming on this plugin 🙂
Thank you Jamie! (It’s nice to get a comment from someone who likes my work and isn’t spam!)
[…] Mark realized big areas of whitespace preceding images didn’t look very professional. Print My Blog’s way of dealing with that was by allowing text to flow around images, filling in the blank space at the end of pages preceding images when needed. But using this feature meant Mark couldn’t know if a paragraph of text would appear before or after an image, or on the same page, which wasn’t how he was accustomed to writing. (Print My Blog now has a feature that will dynamically resize images according to the remaining space….) […]